Introduction
I published several (free) VBA functions that used Google web services, such as Geocoding, Elevation, and Directions, during the previous years. These functions worked in the same way: a properly formatted request was sent to the Google server, and then a response was received in XML format. If the response was successful, the requested field was retrieved (latitude, longitude, elevation, trip distance, etc.) by reading the XML file.
These VBA functions working fine for several years, however, Google started to not allow the requests over HTTP protocol anymore, so these functions have become useless. This is the reason why I decided to rewrite all of these VBA functions while guiding you on how to get a free Google API Key that is now required.
August 2018 Update: Due to the new Google pricing in effect for the entire Maps Platform (started on July 16, 2018), I decided to re-write this guide to follow their updated policy. The new pricing policy reduces the free usage significantly, but still, for small, personal projects can be adequate.
The necessary steps to get a free, valid API key
The tutorial can be used for ANY Google API. As an example, I use the Geocoding API. The only prerequisite for this process is to have a Google account and a credit card. Note: if you don’t exceed the free limits, your credit card will be charged nothing. So, yes, you can use the API key for free, as long as your API usage is low. More information is given below.
Common steps
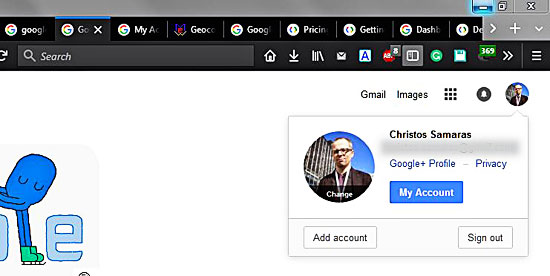
1. First of all, log in to your Google Account.
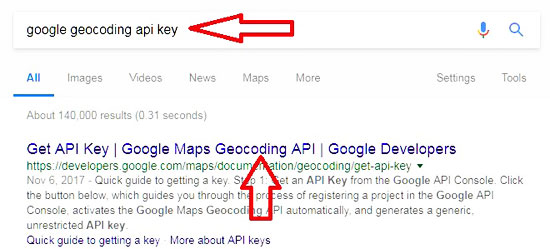
2. Search for the appropriate API by using something like “Google API Name API Key.” The first result will probably be the one you need to click.
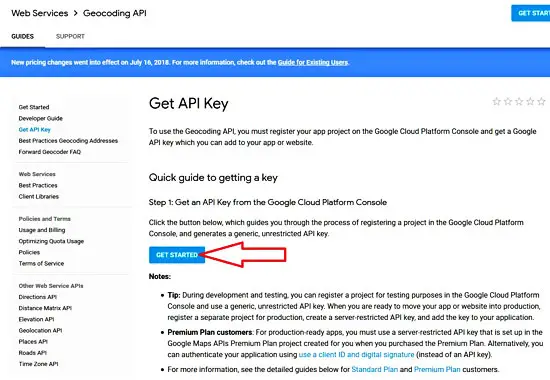
3. On the API page, click on the Get Started button.
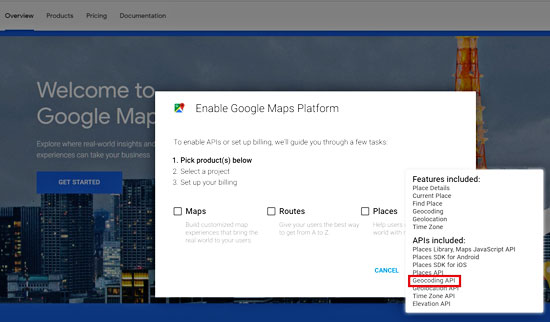
4. A new page will load. On that page, you can hover over the available products to select the one that contains the appropriate API. This example shows that the Geocoding API is included in the third option (Places).
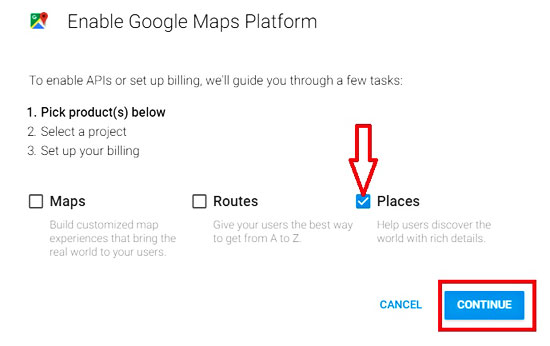
5. Check the appropriate product, the third one in this case, and then click on the Continue button.
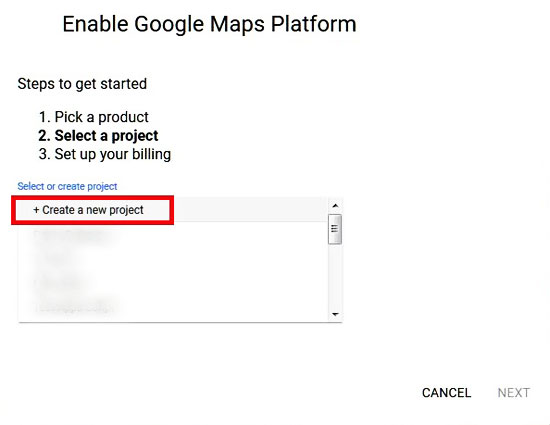
6. Select the Create a new project option and click it.
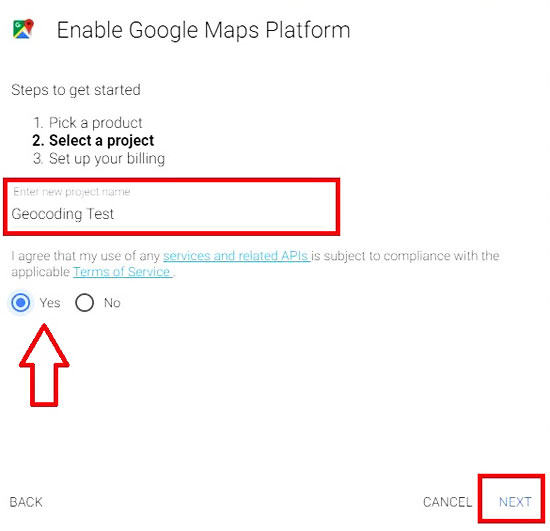
7. Rename the project, select the Yes radio button (agreeing with terms of service) and press the Next button.
New billing account
8. If this is the first time you are using any Google API, you will have to create a new billing account. So, click on Create Billing Account button to create one. The next time you need to use another Google API, you can use the same billing account and follow steps 14 to 16.
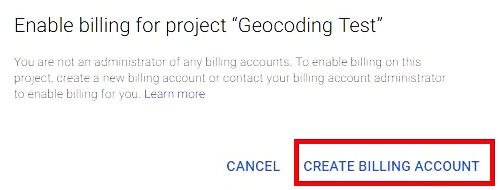
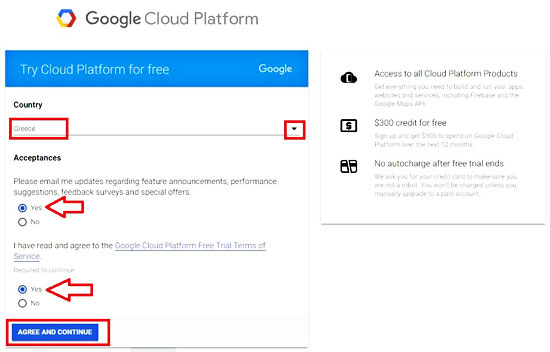
9. Select your country using the arrow button on the left, click Yes (or No) on the radio button to receive (or not) updates from Google, click Yes on the radio button to agree with the terms of service, and press the Agree And Continue button.
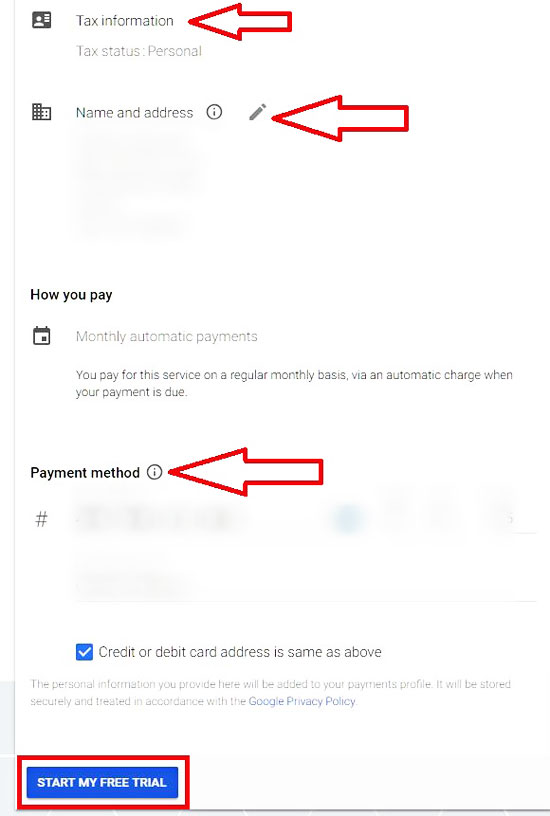
10. Fill in the necessary information, such as tax information, address, and your credit card. Note that debit cards are NOT allowed. Then, press the Start My Free Trial button.
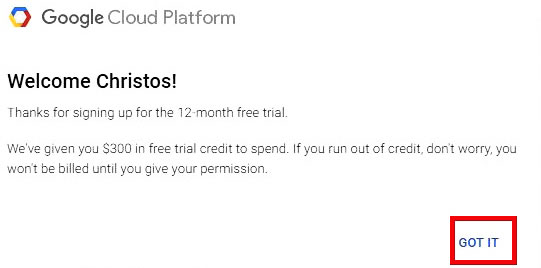
11. Finally, if you filled in all the information successfully, you will get a message like the one below. Press the Got It button.
12. The main dashboard of the project appears. Here you can view some useful information, such as the number of requests, the traffic, and the billing. Click on your API (here is the Geocoding API).
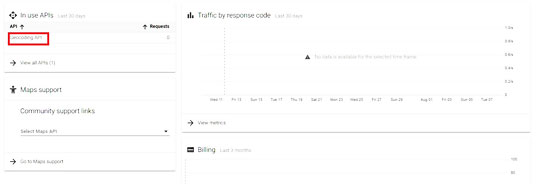
13. On the API page, click on the Credentials tab. There, you will find the API key, which you can copy using the button shown below. If you click on the API Key hyperlink, a new page opens. See more on the Restring the API key usage section of the guide.

Existing billing account
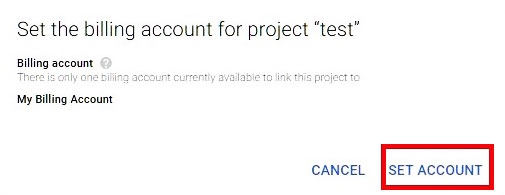
14. If you already have a billing account, you have to click on the Set Account button on the form that will pop up.
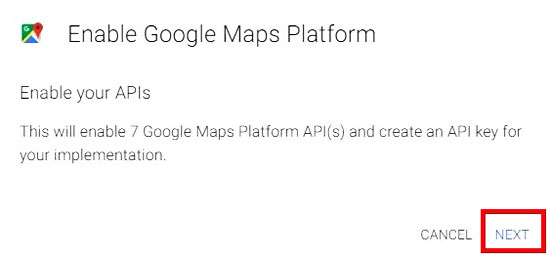
15. On the next form, click on the Next button.
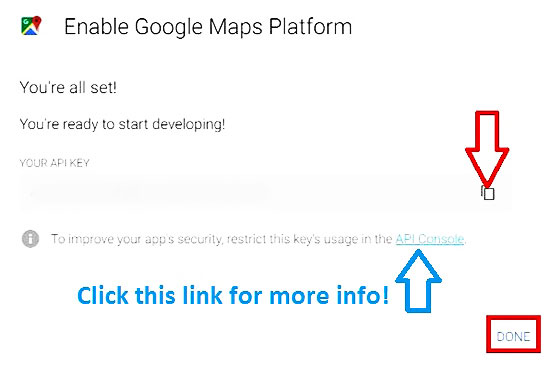
16. In the API form that pop-ups, you will find the API key, which you can copy using the button shown below. Finally, click on the Done button. If you click on the API Console hyperlink, a new page opens. See more on the Restring API key usage section that follows.
Additional information
Restricting the API key usage
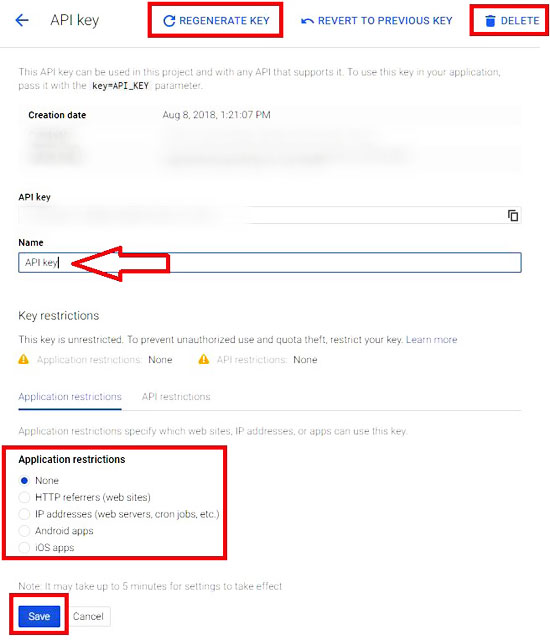
If you clicked either the API key hyperlink (step 13) or the API Console hyperlink (step 16), you would end up on a new page where you can rename your API key, but more importantly, you can restrict its access (if you need to do that). Furthermore, you can regenerate or even delete the key if you no longer need it. Don’t forget to click the Save button after any change you make.
Using API key in VBA functions
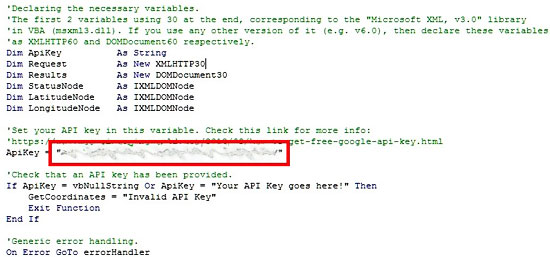
If you want to use your API key in one of the VBA functions that I have uploaded, for example, the GetCoordinates function, you have to paste the key in the line shown below (e.g., assign it to the ApiKey string variable). Note: use quotation marks before and after the key!
Free API key limitations
Until July 16, the pricing policy of Google allowed 2,500 free requests per day and per API. However, free requests have been dramatically reduced. Hence, according to the new pricing, for the case of Geocoding API, as the image below shows, the free requests per month are only 40,000 (i.e., 1,333 requests per day on average). In other words, the free requests were dropped in half (46% reduction). So, when you need to use an API, please take a closer look at the allowable free requests on this table and try not to exceed them. More information about the billing can be found here.

Monitoring your API requests
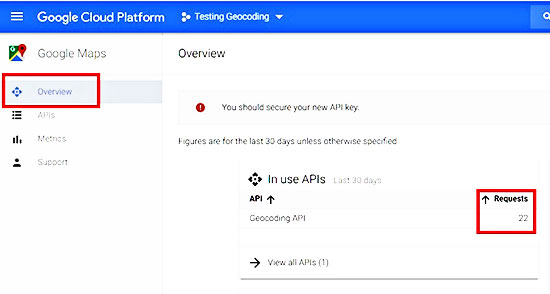
As we already mentioned, the free usage is limited to a specific number of requests per month. To have an overview of how many requests you performed, you can go to your project’s page in the Google Cloud Console. There, on the Overview tab, you can see the number of requests you have already done. In the example below, 22 requests were sent to Google’s server. If you don’t want to pay any money, be careful with your free limits.
Epilogue
If you followed these steps, you would get a valid API key to use on your projects. To save you some time, here are the links to the API key pages that I have used in the VBA functions published on this site:
- Geocoding API Key – Geocoding Using VBA & Google API
- Geocoding API Key – Reverse Geocoding Using VBA & Google API
- Elevation API Key – Custom Elevation Function (VBA & Google API)
- Directions API Key – Custom Trip Distance Function (VBA & Google Directions API)
Page last updated: 15/06/2019

Christos, Thank you for the detailed article. However my code does not work. I followed all the steps, which are a bit different that what you described. But I have a google account, with emails from google to confirm it, and a project. Since yesterday I generated, tried and deleted three keys. I still have three keys attached to my account. but none of the keys worked in your code or on your web – it’s always the same problem of the Server Denying Access. What could be wrong.
You ‘re welcome!
Indeed, it is not so difficult, but somebody can easily activate the wrong API (steps 4 and 5).
Very informative this “go through” guide. Thank you Christos for posting this topic so clearly -which is not so overwelming at the end, but has some points to consider before reaching the end of the process-.