Introduction
Google Sheets, along with Google Docs and Google Slides are a spreadsheet, a word processor, and a presentation program respectively, all part of a free, web-based software office suite offered by Google within its Google Drive service. The three applications are available as web apps, mobile apps and desktop apps (on ChromeOS only). The applications are compatible with the corresponding Microsoft Office file formats, therefore, the user can save an “online file” to his desktop and then open it with the appropriate Office app.
To be more precise, the Google Sheets app is very similar to Excel. If you have ever used Excel, especially some pre-Ribbon version (Office 2003 and back), you will understand how the Google Sheets app works. The similarities don’t stop only on the environment and the user interface. The Google Sheets app contains an internal script editor where the user can create his/her custom functions, similar to VBA functions in Excel. The language that is used to create these custom functions in Google Sheets is called Apps Script. The Apps Script is also used in other Google apps, so it reminds a lot of the universal usage of VBA in the entire Office suite.
The Apps Script is Google’s version of ECMAScript, which runs on its servers (not in the browser). Consequently, Apps Script can be considered as a browser-independent language. If you haven’t heard the ECMAScript in the past, don’t worry! You probably already know another “dialect” of it, called JavaScript. In short, Apps Script is based on JavaScript 1.6 with some portions of 1.7 and 1.8 and provides a subset of ECMAScript 5 API. According to Google, the Apps Script “provides easy ways to automate tasks across Google products and third party services”. This is the language that we will use in this tutorial.
Create a new spreadsheet on Google Sheets
Before we write our first custom function using Apps Script, we will learn first how to create a new blank spreadsheet on Google Sheets. So, please follow the next simple steps:
Step 1: First of all, ensure that you are logged in to your Google account.
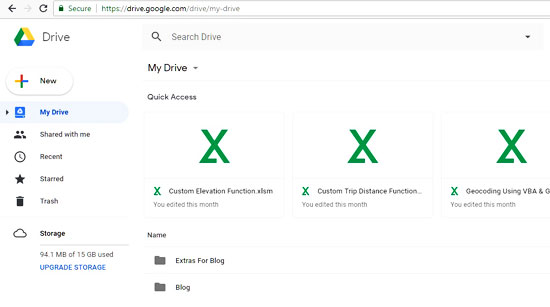
Step 2: Go to the Google Drive page.
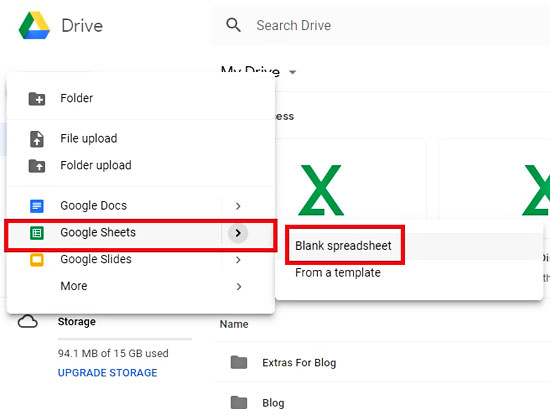
Step 3: In this page, you should click on the New button. Then, on the drop-down menu select the Google Sheets option by clicking the small arrow. Finally, click on the Blank spreadsheet option.
Step 4: A new spreadsheet is created and you are redirected to a new page. To rename and this spreadsheet, click on the Untitled spreadsheet title and enter your preferred name.
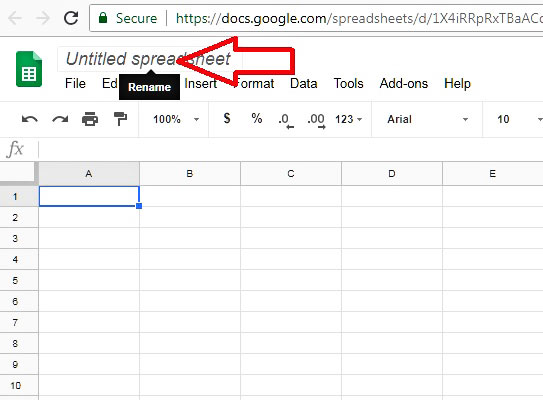
If you hit enter, the spreadsheet will look like the image below.
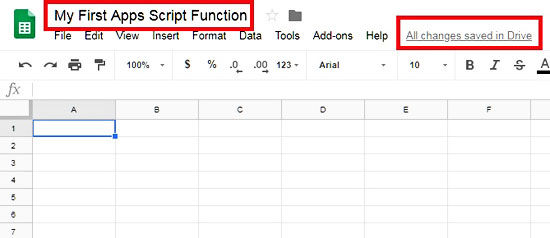
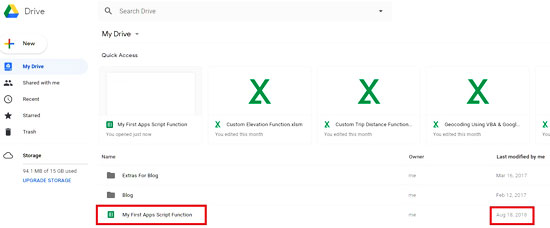
Note, that all the changes are automatically saved in Google Drive, so unlike Excel, you don’t have to manually save it. Here is what you will see on your Google Drive:
The Apps Script editor
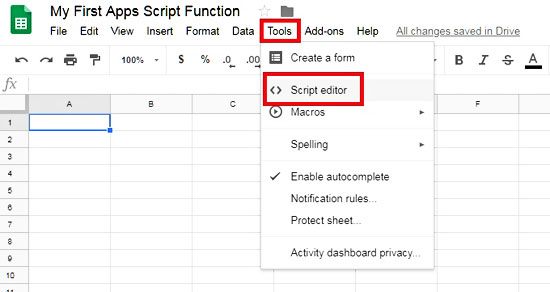
Now that we have created and renamed our spreadsheet, we are ready to switch to our Apps Script editor. Select the Tools category from the menu and then click on the Script editor option.
A new page pop-up; that’s our Apps Script editor or if you prefer our Integrated Development Environment (IDE). Unlike the VBA IDE, it is relatively simpler, nevertheless, it includes sufficient functionality.
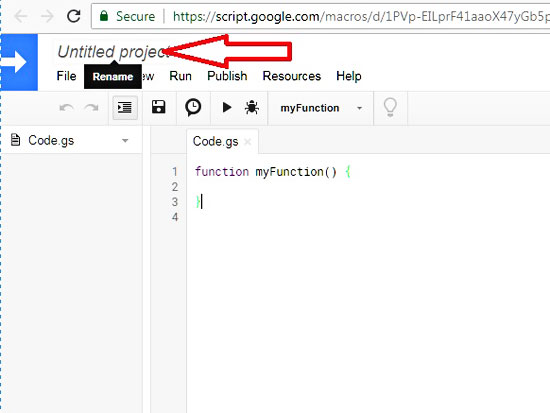
The default project contains a single script file (Code.gs) and an empty function (myFunction), which we will modify in a little bit. Script files are similar to VBA modules. Multiple script files can be created and organized inside a single project (i.e. as it is in the case of a VB 6.0 project). Within each script file, you can write code that is accessible from all the script files included in the project. Unlike VBA, there is no option to restrict access using the Option Private Module.
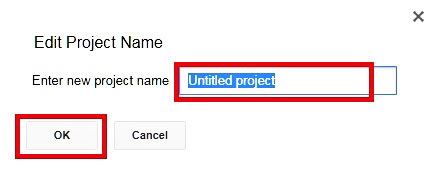
If you need to rename the Untitled project, simply click on the title. An input box will pop-up, prompting you to give a name. Type your preferred name and click the OK button.
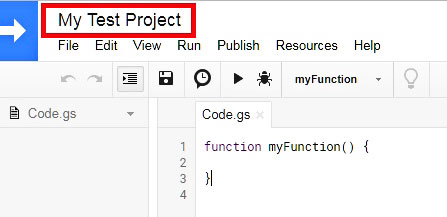
Here is how the renamed project would look like.
Creating your first Apps Script function
In this point, it should be highlighted that the custom function will be created inside a container-bound script that is part of our spreadsheet. The container-bound functions are equivalent to VBA functions that are part of an Excel spreadsheet. Bear in mind, though, that there are also standalone scripts, which are created on Google Drive and usually contain generic functionality that can be used across multiple Google apps. In other words, these scripts are not bound to a specific spreadsheet or document. However, we will talk about this kind of functions and scripts in a different tutorial.
Our first function will calculate the area of a circle, given its radius. The formula is very simple:
Area = π ∙ Radius²
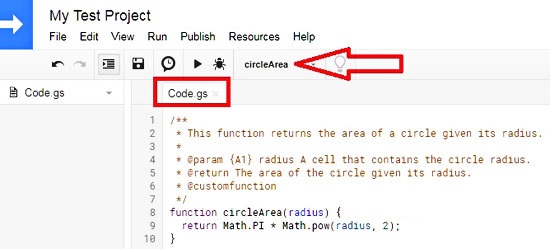
Here is the complete code for the custom function:
/* Start of the GAS code. */

/**
 * This function returns the area of a circle given its radius.
 *
 * @param {A1} radius A cell that contains the circle radius.
 * @return The area of the circle given its radius.
 * @customfunction
 */
function circleArea(radius) {
  return Math.PI * Math.pow(radius, 2);
}

/* End of the GAS code. */
Let’s analyze the code a little bit:
- The circleArea is the name of the function that will be used from the spreadsheet. Here we followed the typical camel case notation (e.g. the practice of writing compound words or phrases such that each word or abbreviation in the middle of the phrase begins with a capital letter, with no intervening spaces or punctuation).
- The radius is our input variable. Note that, unlike VBA, we don’t have to declare the variable’s type (e.g. double) since, in Apps Script, all the variables are of type var.
- The code that starts with the return word is actually the mathematical formula translated into code. Ιn Apps Script, similar to JavaScript, we have to use an internal library called Math for some common mathematical expressions (as it is in the case of power and the constant pi – π).
- Finally, the comments that are enclosed between “/*” and “*/” are optional, but very helpful since will be used by the Autocomplete feature, which we will see below.
Your first custom function is almost ready! As you can see in the image below, an asterisk appears next to the Code.gs file. Click the Save button or use the CTRL + S shortcut from your keyboard.
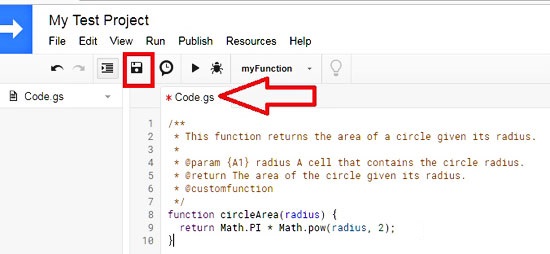
Congratulations! You just created your first custom Apps Script function. Here is how the saved function would look like. The asterisk is gone and the function name will appear in the dropdown menu that contains the functions.
Use the custom Apps Script function from the spreadsheet
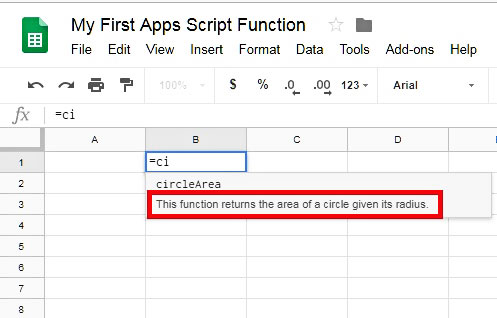
You can now close the Apps Script editor and go back to the spreadsheet. In a random cell (e.g. B1) start typing the function name (=circleArea). If you just type =ci notice that the Autocomplete feature appears, showing the function description.
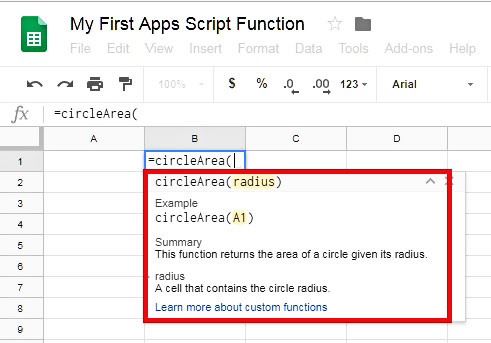
If you click with the mouse upon the Autocomplete window, or simply press the Tab key, you will see the full function description. This is the reason why it is a good practice to fill the function description in the script editor.
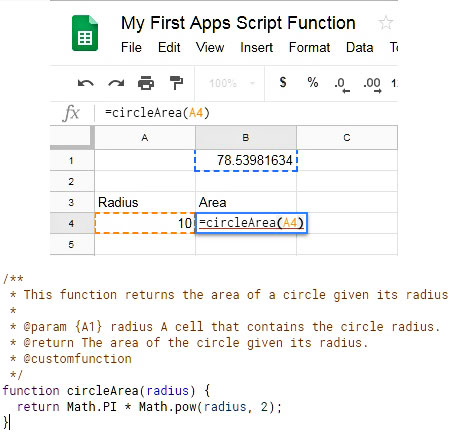
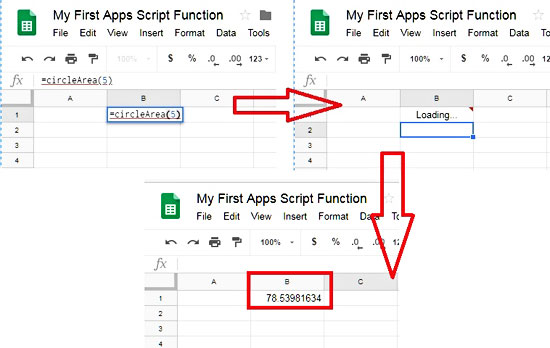
If you type =circleArea(5) and click the Enter, you will see a Loading message and after a few seconds, the actual result in the cell (78.53981634).
Of course, apart from manual values, we can use the function with cell references. In the example below, we use the function with the cell A4.
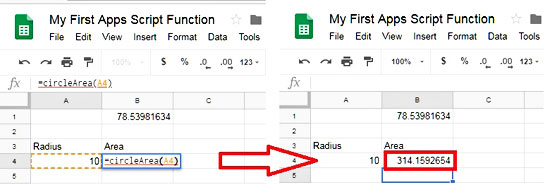
Well done! You have successfully created and used your first custom Apps Script function. More tutorials on Apps Script will follow soon. Meanwhile, if you need more information about the custom Apps Script functions, you can visit the official page.
Read also
Geocoding & Reverse Geocoding Functions In Google Sheets
Page last updated: 17/06/2019

